How to make a Sandblasted Wood Sign
 RECIPE FOR A WOOD SIGN
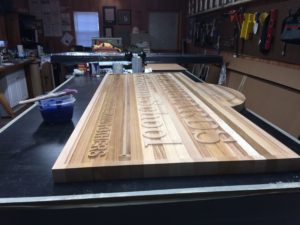
How to make a sandblasted wood sign should be well-explained in this article. Making a sandblasted wood sign, or any customized solid wood sign for that matter, begins with gluing up the raw boards stacked end on end with a high-grade exterior wood glue. My choice has always been West System brand marine epoxies. Clear, All-Heart, Vertical Grain (CAHVG) boards are the best grade for carving, routing or blasting, so after you purchase those, you want to rip them down on your table saw to a maximum of 7.25″ wide boards, the less the better to avoid the possibility of the finished sign panel bowing/cupping/warping out in the weather.
Glue and clamp the boards at about 80% tightness to avoid squeezing out the epoxy in the joints, using clamps on both sides of the panel spaced at 24 inches or so on center or less for even pressure. After curing overnight, remove the clamps and sand with a power sander starting with rough grit and ending with fine grit. An orbital sander works fine. After sanding and prior to sand-blasting, you have the choice to either apply a stencil (a thin rubber mask that can be cut with the desired design) directly on the bare wood, or prime and paint the panel and then affix the stencil. In the case of the sign shown for C.F. Richards Christian School in Staunton, Virginia, my subcontractor blasted the sign raw. The advantage of this method is that the stencil won’t pull the paint on the letters. The advantage of painting first is it’s a lot easier to paint the sign as you leave the stencil on the letters while staining the  background, then you peel the stencil and the sign is done. However, that isn’t always the case, and more than half the time you have lots of touch ups or worst case is you end up having to re-sand, prime, and paint because the stencil pulls the finish.
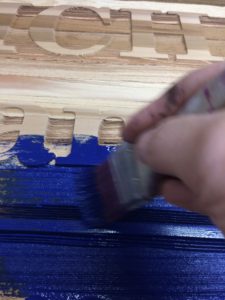
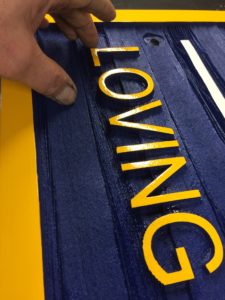
In the case of the C.F Richards School example, I primed the background with a high-quality primer and then painted the lettering, logo, and borders with high-quality sign enamels. Since this was a one-sided sign with the back exposed, I also primed and painted the back. The aluminum posts and finials were black, so we decided to also paint the back black to match.
LASTING IMPRESSION-LOW COST PER MONTH
This sign, put into service in January, 2017 will last an undetermined time spanning many decades. The seemingly high cost per square foot is not as big a price as it seems when you calculate  the cost per month (CPM) of the advertising. If the sign lasts 50 years with 3 maintenance periods and the monthly cost ends up being eleven dollars a month for very high-impact branding. Unfortunately, the C.F. Richards Christian School is not on a main thoroughfare, so the traffic count is mostly made up of parents, staff and neighbors and their friends living on the residential street where it’s located. Otherwise, if on a highly traveled street with high traffic count, the cost per impression would be extremely low at $11.00 a month. Compare that with TV, radio, magazine or newspaper advertising, and you’ll see that signage is one of the few marketing options that has great value. Kind of up there with blogging on the internet!!
Mark Hackley is owner/operator of Augusta Sign Company– A small business that designs, makes, installs and maintains custom wood signs for customers in Virginia. 540-943-9818 mark@augustasigncompany.com