How to Make Sign Patterns Using Your Photocopier
 Back in the old days (early 80’s), I remember using an Art-O-Graph projector to cast images and letters on the wall and then trace the images to pattern paper. I am not sure what happened to that old projector over the years, but nowadays it’s just as easy using a photocopier, at least for small to medium sized signs. For larger signs I can use the old grid layout system, where you print out a scaled drawing of the sign and overlay it with grids that you can then scale up to the surface you are painting.
In a recent case I used the copier to make a pattern for a few real estate advertising signs. The customer had some old fiberboard panels that I could use for the signs and I hand lettered them with basic information about how interested parties could reach them about a piece of commercial property.
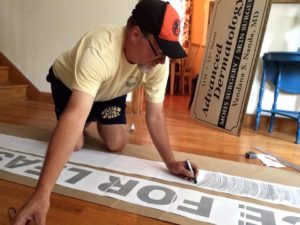
I did the layout in CorelDraw X5. I printed the letters actual size by making sure I picked “as in document” vs “fit to page” on the printer/copier. Once the letters printed, I scotch taped them all together, used a carpenter’s pencil to blacken the back where the letter lines were, and then corner-taped the pattern to my signs, traced the lettering, and painted.
All done in very little time and effort and less expensive than having to order vinyl, weed and tape it, etc. For temporary applications it is a great solution. Plus, I don’t get many chances to hand letter signs anymore; something I still kind of enjoy. I reckon I’m just an old timer!
Mark Hackley is owner/operator of Augusta Sign Company in Waynesboro, VA
Contact: 540-943-9818
Many thanks to Holiday Signs for teaching me how to use WordPress 🙂